|
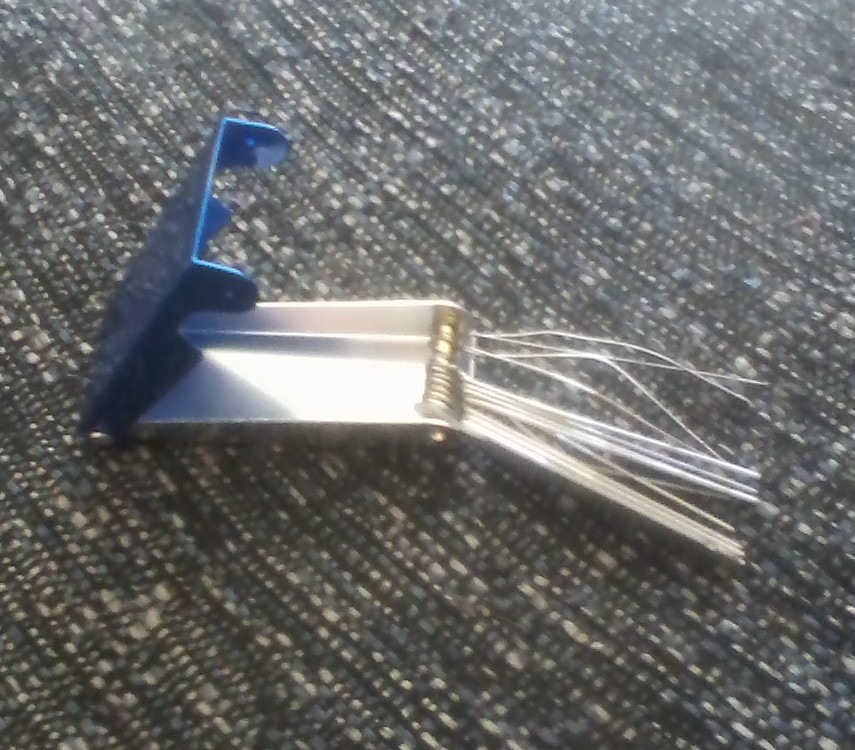
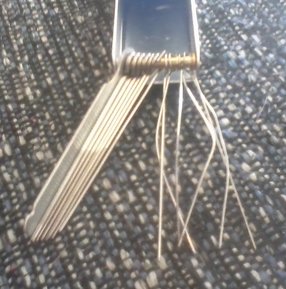
Last week (here), I laid out my plans and reasoning for adding a 6th string to El Hefe, the "Pisgah-esque" banjo I built in a workshop last January (more on that here). This past week, I received the remaining necessary materials (i.e. a set of nut files and an extra tuner) in the mail, and today I got about halfway through the conversion process. Unfortunately, I was not able to finish converting El Hefe to a 6 string today, and I've got too much "real work" (...microbiology stuff...) to catch up on tomorrow to finish up this weekend. Therefore, I regret to inform any regular readers that this series of posts has turned into a 3-parter and, sadly, there will be no sound files further down the page for you to chew on : ( However, I did make progress and I'm pretty eager to share, so here we go: New plan for adding slots to the nut: If you read last week's post (again here) you'll remember that, rather than making a new nut for El Hefe's 6 string configuration, I decided to simply add extra slots to the existing nut and live with the resulting mess. My original plan was to use the existing 1st and 4th string slots for the new 1st and 5th (bass) strings and cut 3 additional equidistant slots between the two as follows: 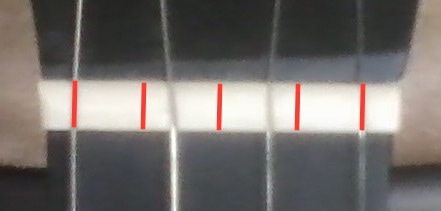 Figure 1 - My original plan for where to put the 5 long strings in the 6 string configuration of El Hefe (in red). Note that the "outer slots" would have been left where they were for this plan. ....however, after thinking about this a bit more I decided to alter this plan a bit. While I would still use the old 1st string slot in El Hefe's new 6 string configuration, I decided to cut a new 5th (bass) string slot a bit to the left of the old 4th string slot. Once this was done, I would cut 3 equidistant new slots between the (old) 1st and (new) 5th string slots for the remaining 2nd, 3rd, and 4th strings. I chose this path for 3 reasons: 1) I could make the string spacing at the nut just a hair wider. While the old spacing of 1 3/16" was probably going to be wide enough, I figured it couldn't hurt to go a little wider if possible; in the end I was able to add another 1/16" without the 5th (bass) string being in danger of flopping off the edge, so I went for it. 2) I could easily convert the banjo back to a 5 string if I didn't like the results of the 6th string addition. If I widened the existing 4th string slot too much to make room for a fatter 5th (bass) string, I might have problems putting a 21w (my preferred 4th string gauge) in there if I ever choose to shift El Hefe back to a 5 string. While I'm pretty stoked about having a 6 string currently, El Hefe is just a phenomenal 5 string banjo and I could see myself wanting to shift back in the future (though I'm not sure what I'd do with that pesky extra tuner I plan on adding : ) 3) Moving the 5th string over centers the string spacing. This one takes a bit of explaining for those who may not spend much time thinking about banjo construction. Though its to the left side of the nut, the 3rd string is actually the "center" of the banjo neck; see pic below:  Figure 2 - "Brasstown Belle," Jeff Johnson's hand built "Pisgah-esque" banjo and a littermate of El Hefe (Pic courtesy of Jeff Johnson). I've marked the path of the 5th string in red; you can see that it goes over the center of the bridge and tail piece; it also marks the center of the neck where it meets the pot. As a result of the left side of the neck being "cut away" above the 5th string, the 3rd string sits towards the left site of the nut. However, the 3rd string is still correctly though of as the "center" of the banjo neck. Hopefully that picture helped illustrate what I was talking about above (there are likely much better explanations at www.banjohangout.org). The logic for my change in plans therefore goes like this: on a 5 string banjo, the 3rd string should be "centered" on the neck. On a 6 string banjo, the neck should similarly be "centered" halfway between the 3rd and 4th strings. However, if you look at my original plan (Figure 1) the original 3rd string slot is not centered halfway between the new 3rd and 4th string slots; rather, its skewed a bit left. By moving the new 5th (bass) string a bit left and leaving the 1st string where it was, I hoped to correct this error. Actually filing the new nut slots: To actually do all of this, I bought what can only be described as the cheapest set of nut files available from Amazon. To be clear, I mean "cheapest" in every sense of the word: The whole set, which includes 14 files of various sizes, only cost me ~$10, while individual files usually cost ~$20 each. So I saved some cash but the files were crazy dull, and it took me several hours to file 4 slots. Furthermore most of the files bent in the process. I only have the "after" pictures, below:
Figure 3 - "Mr Power Music Sander Files for guitar nut and bridge saddle" that I bought from Amazon. While the name is definitely amazing, and likely worth the price alone, nearly every file I used bent (see right image) and I'll likely never get another use out of these. I used my old strings slots as guides for how thick of a file to use and how far to file down into the nut. Despite the bent files, I'm actually pretty pleased with the results in the end. Below is a closeup pic of the nut with the new and old slots visible: 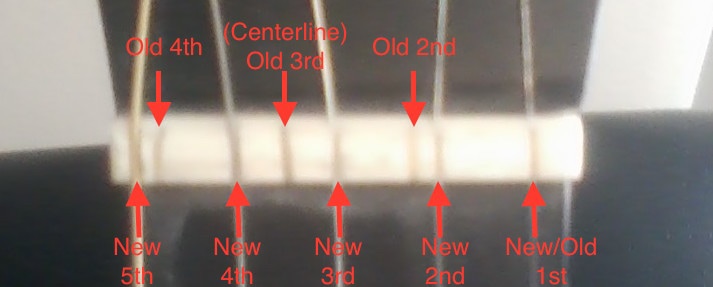 Figure 4 - The nut after my hours of labor with "Mr. Power Music Sander Files...." As you can see, the "Old" 3rd string falls halfway between the "new" 3rd and 4th strings; mission accomplished! After getting the nut slots cut, I put a 30w guitar string on the 5th (bass) string slot, tuned it up to pitch (low A), and plunked around a bit....sounded pretty cool!! Final thoughts for now: As I've said, I've yet to drill the hole for the new tuner but I plan on doing that at a friend's house this coming week. I couldn't resist seeing what the final product would look like with a string in every slot, so I doubled up on one of the tuners and one of the tailpiece knobs and took the following pics:
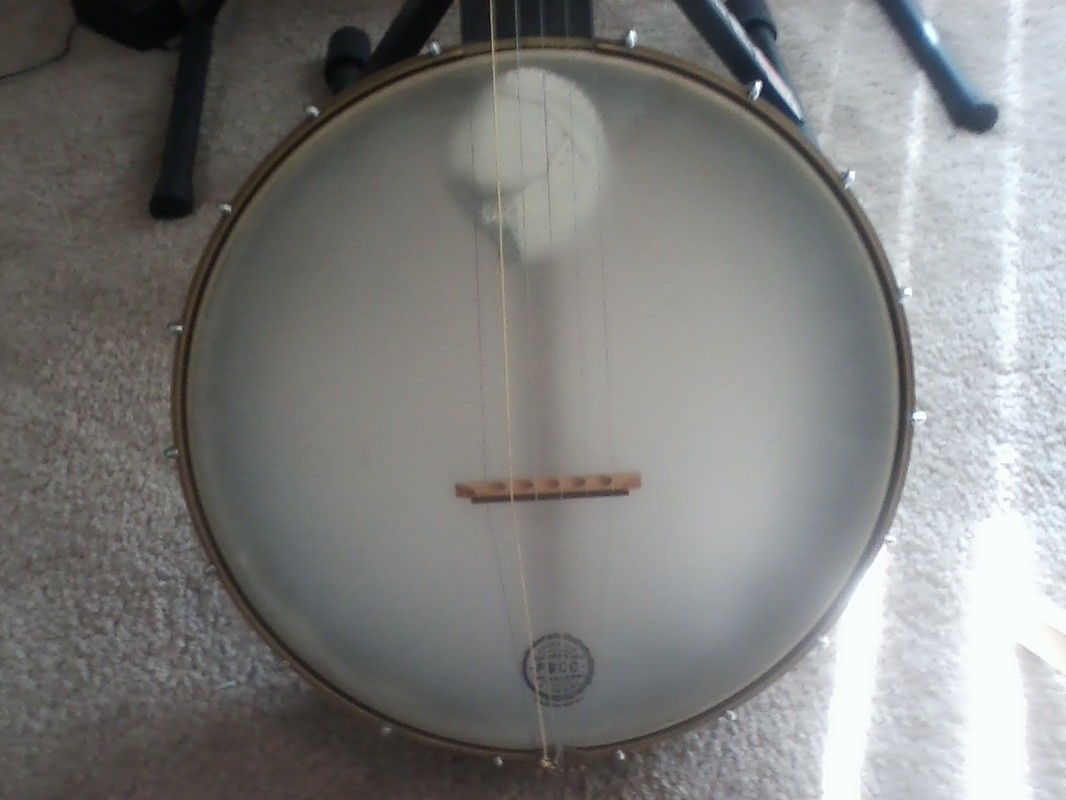
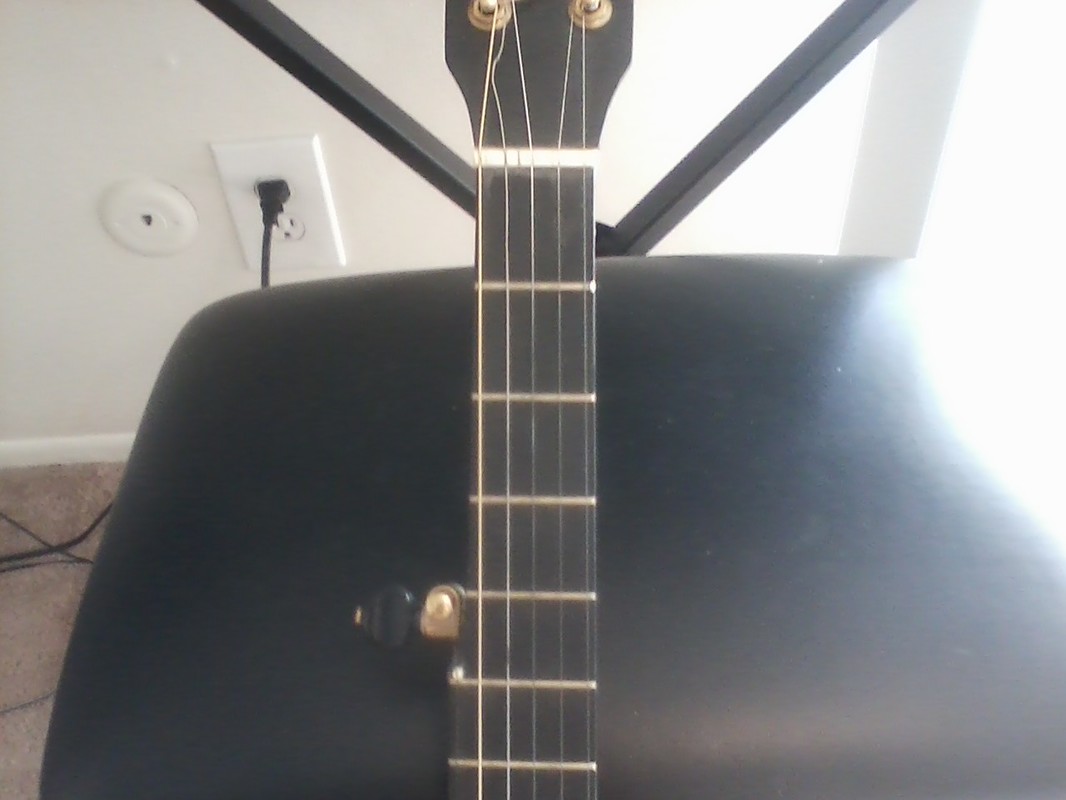
Figure 5 - Closeups of the head/bridge and fretboard/nut of El Hefe in its new 6 string configuration. Those aren't the best pictures, but I'll try and take some good ones once the new tuner is up and running; I just can't wait!! Also, I plan on ordering a couple of loop end options for the 6th string - the 30w string I tried seemed okay but its much lighter than what's been recommended (40w) so I'll try a few heavier options as well.
Thats all for now - stay tuned for sound files in the near future!
3 Comments
Stew Ellis
2/19/2017 02:25:16 pm
Please note my reply to you comment in part 1 regarding a tailpiece. Another thing you might think about is the zero nut kit. I think I got one from by Gold Tone from either Elderly or Stewmac. I got it to setup my new Eastman neck (which I still haven't done anything with) so that I could go back and forth between nylon and steel with only a bridge change. The slot can be very loose because the string is stopped by the 0 fret. I think they are ugly but they it much easier to fit a nut. Wish I had mentioned this earlier.
Jeff N
2/19/2017 05:48:55 pm
Those zero-glide kits are interesting - and with the wider slots I think its a really elegant solution to your convertible steel/nylon conundrum. My buckeye actually came with an extra nut cut a bit wider for nylons (which is what the neck was originally made for - Greg just didn't have a use for the extra nut and threw it in). It would be easy enough for me to switch out nuts if I ever wanted to go that way...but not everyone has that luxury : ) 11/3/2017 02:55:06 am
Part 2 was even more exciting than the first part and I really enjoyed reading the next part. There are many exciting things that had been reveled which had been in suspense in first part. Leave a Reply. |
-----
|
 RSS Feed